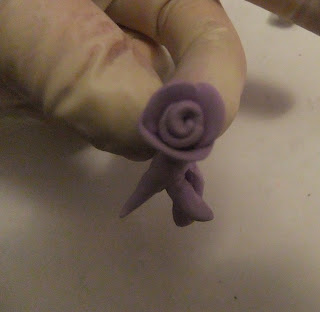
First, start out with a small ball of clay, about the size you want your rose to be. Mine is about the size of 2 peas put together.
Next you want to roll your clay into a snake. Mine was 3 inches :)
Cut your snake into 4 pieces, but make one piece smaller than the others, about half the size maybe. The small piece will be the center of your rose.
Flatten the small piece, not too thin so it rips though.
Next, roll the flattened piece into a spiral like this
-------------------------------------------->>>>>>>
Then you want to take the other 3 pieces you cut and flatten them at the top so the look like the shapes above-almost like an ice cream cone. These will be your petals.They don't have to be perfect. The bottom "cone" part will be removed at the end anyway.
Wrap your first petal around the center rosebud, the spiral part you made.
Next, wrap the second petal, slightly overlapping the first. Do the same thing with the third petal:
If you want, you can lightly pinch the outer petals with your fingers and fan them out a bit to make the rose a little more realistic looking.
The bottom of your rose should look something like this ^^
Cut it off, and try to keep the bottom as flat as you can so it rests on your nails better.
Voila! Your rose should look something like these ^ Not perfect, but they're cute. If yours look like crap, keep trying! Practice makes perfect, I promise!
I used my roses on my fairy kei/lolita/gyaru/kawaii/Japanese/hime/princess 3d nail art: Or whatever you wanna call it :) lol!
 |
| Pretty, yeah? |


I want those 2; i think i'm in love with all your nails haha :p. I also want to try those huge drama pointy nails too but thn i need someone to do everything for me and i'm just like - oh shit can you pick that up for me? Ohh i have to pie UNZIP me hahaha :']
ReplyDeleteAs i said before i cant wait to have my money!
Do your nails fit on all nails/hands? I self have kinda small nails and normally you have like 15 nails in a pack so thats not a problem with all sizes but i dont know how big the nails are that you make ..
Oh and i cant follow you for some reason -,-
it sais ; blabla our ecxuces blabla i cant see the Follow gadget meh.
xo Shirley
Nice Tutorial! They look so beautiful <3
ReplyDelete